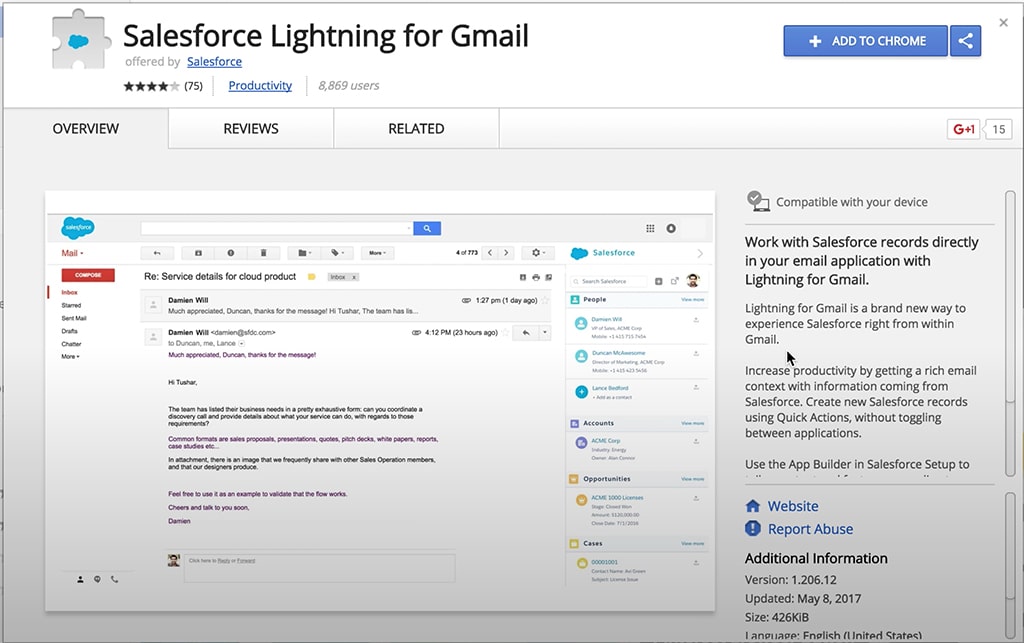
With Summer 17’ Salesforce has added a free (and viable) alternative to paid apps that integrate your email inbox with Salesforce – this new alternative is called Lightning for Gmail. With Lightning for Gmail, clients can integrate their Gmail inbox with their Salesforce instance via a Chrome extension called Salesforce Lightning for Gmail. This extension creates a side panel that, after logging in, enables users to search, edit, create, and relate (emails to) records in Salesforce.
There are differences in functionality depending on whether or not a server-level synchronization is configured. This article will outline Lightning for Gmail functionality in two parts; (1) functionality available by installing only the Chrome extension (without a server synchronization) and (2) functionality available after a one-time sync configuration between Google and Salesforce servers.
Chrome Extension Functionality
There is a lot of functionality that comes with Lightning for Gmail extension out-of-the-box:
- Easily accessible side panel to search and maneuver (Create, Read, Update) Salesforce data from the inbox.
- Create records via the “+” icon in the side panel Publisher.
- Customize what can be created via Lightning for Gmail Setup menu under Email Application Publisher Layouts.
- Click the icon to the right of “+” to open a new tab in Salesforce (specifically on the record you’re currently viewing in the side panel)
- See Salesforce notifications via the bell icon
- Relate emails with one click
- The side panel will auto display People records (Leads, Person Accounts, Contacts) matching the email addresses in the email you clicked on
- The side panel can also be used to relate events in Google Calendar
Post-Server Synchronization Functionality
The central purpose of server sync is auto-synchronization of Contacts/Events in both Gmail and Salesforce. Once the synchronization is configured you can set filters/conditions for which Contacts/Events auto-sync, conflict behavior (which edit wins when the record is being edited in two different places at the same time), and sync direction. Server synchronization is what makes Lightning for Gmail viable as a substitute for paid email integration apps like Ebsta/Cirrus, without it you can really only access Salesforce from Gmail, which is great but not technically a substitute for the core functionality provided by paid apps.
- Gmail-to-Salesforce, Salesforce-to-Gmail or Bi-Directional Sync of Contacts/Events
- Configure data filters for syncing consistency
- Events are automatically related to Contacts via the email address used to invite guests
- Emails are not automatically synced here and still need to be manually synced
- Auto-Sync Contacts
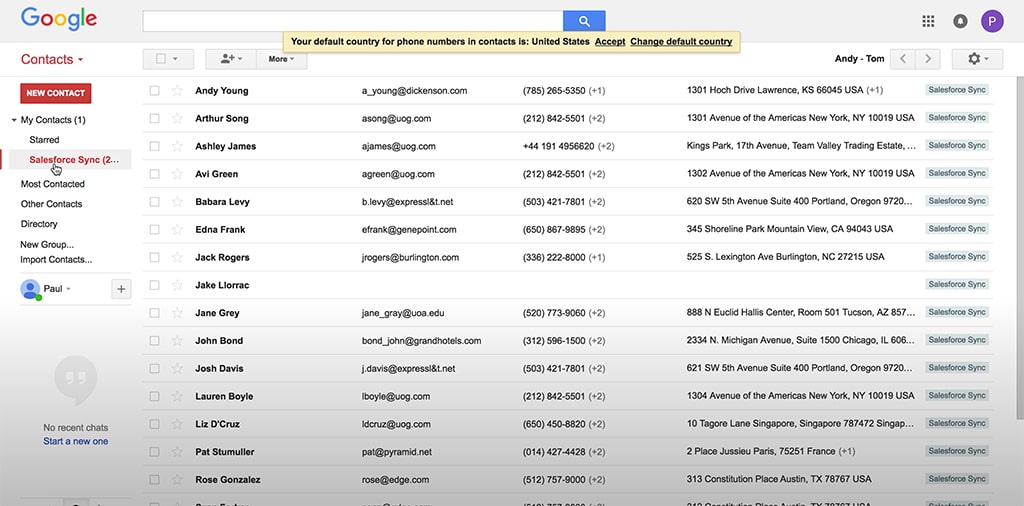
- When server sync is configured, the Gmail Contacts tab will contain a Salesforce Sync folder
- Any Contacts created from within this folder are automatically added/synced with matching Salesforce Contact and vice-versa depending on Sync Configuration
Now that You know the difference in functionality between simply installing the Chrome extension and Installing the extension + configuring server sync you can make a decision about what is necessary for your use case. If Lightning for Gmail is to be used in place of a paid app, it’s highly recommended to configure a server synchronization – the following section will walk you through how to do this.
Setup Considerations
- The client must have a G Suite Account for server synchronization.
If the client only uses free Gmail accounts it won’t be possible to synchronize their Contacts/Events automatically, but Chrome Extension functionality still applies.
- Enhanced Email & Email-to-Salesforce should be enabled regardless of whether or not you’re configuring server sync
- Users can install the Chrome component to maneuver Salesforce data without server synchronization.
- Server sync enables auto-syncing Contacts/Events in both locations.
- Events are auto-related to Salesforce records via the email address used in the event invitation.
- Email addresses in Salesforce User records must be identical to their emails in Gmail.
Gmail-to-Salesforce Sync Configuration & Behavior
1. Enable Lightning for Gmail + Add Google API to Remote Site Settings
- Setup > Lightning for Gmail > Enable Lightning for Gmail
- Search Remote Site Settings in Quick Find box > Remote Site Settings > add a Remote Site
- Name can’t have spaces
- Input https://www.googleapis.com for Remote Site URL
2. Open Google Developer Console
- https://console.developers.google.com
- Create a Project
- Click Select A Project on Developer Console home
- Select an Organization
- Click “+” and input details like Project Name
- Enable the Calendar API
- Search “Calendar” on the Library tab
- Click Google Calendar API
- Click Enable
- Enable the Contacts API
- Search “Contact” on the Library tab
- Click Google Calendar API
- Click Enable
- Create Credentials for a new Service Account with Role of Project Manager and key type JSON
- Click Credentials tab
- Click Create Credentials and select Service Account Key
- Under Service Account select New Service Account
- Name the Account and select role (Project > Owner)
- Choose JSON for Key Type
- Create the project
- Note the file you auto-downloaded
- This file is essential to completing setup, make sure it’s accessible
- Enable Domain-Wide Delegation for the Service Account you just created
- On the Credentials tab, click Manage These Service Accounts at the top-right of the column
- Click three dots at the right of the row
- Click Enable G Suite Domain-wide Delegation
- Click Configure Consent Screen
- Only input Product Name as “Lightning for Gmail”
- Click Save
- Click Save
- Note the View Client ID under the Options column, you’ll need Client ID in the next step
3. Open Google Admin Console (Admin credentials required to make configurations here)
- https://admin.google.com/
- Click More Controls at bottom of the homepage, then click Security
- Click Show More, then click Advanced Settings > Manage Client API Access
- Copy/Paste Client ID from Google Developer Console into the Client Name field
- Copy/Paste the following scopes (comma delimited) into the One or More API Scopes field
- Click Authorize
4. Go to Lightning Sync Setup
- Type Sync into Quick Find bar > Sync Settings
- Enable Lightning Sync
- Under Connect Salesforce to your Email Server click Edit, then click OAuth 2.0 for Google
- Upload Google Private Key
- This is the file that was auto-downloaded in Google Developer Console
- Test an email address belonging to the specified Gmail server
- You’ll get success messages if integration was configured correctly
5. Go to Lightning Sync Configuration
- You can set particular synchronization settings per User/Profile (which Events get synced, which direction sync occurs, conflict behavior)
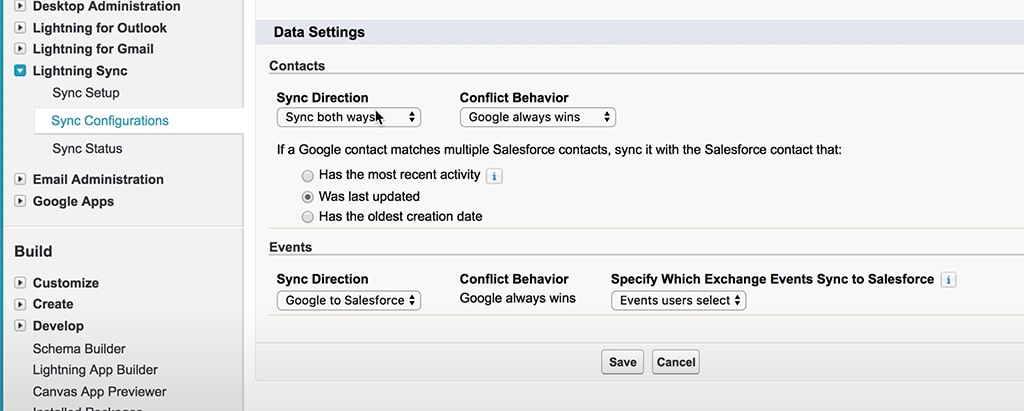
- If configuring for the first time You’ll be taken to a Default Data Set which allows you to create filters and conditions for what data is synchronized automatically (i.e. Events marked “Private” don’t sync)
NOTE: You can check Synchronization Status for any particular User
- Type Sync in Quick Find bar > click Sync Status > click Lookup icon and select User > click Check Status
- You’ll see sync status for Events & Contacts, as well as a count of how many records have been synchronized from this particular User’s email
Video Resources
These videos can walk you through functionality/setup with visual examples.
Full Features w/ Server Synchronization Configured
Walkthrough of how to Synchronize Servers

